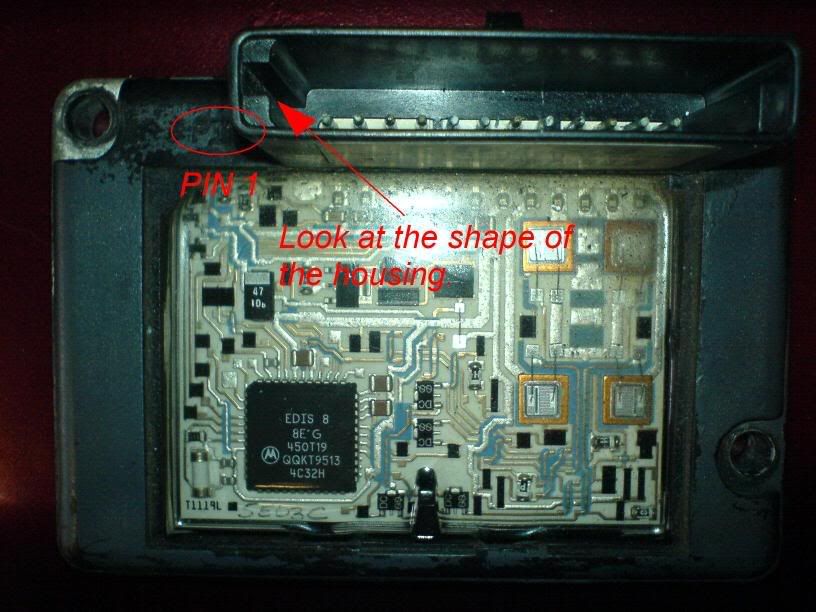
Using the retaining clip for reference on my EDIS8 on the shelf (F1AF-12K072-AC), LOOKING INTO THE MODULE (not the wiring) PIN 1 embossed on the module is next to PIP, PIN 6 is +12v power, PIN 10 is ground and everything else is relative.
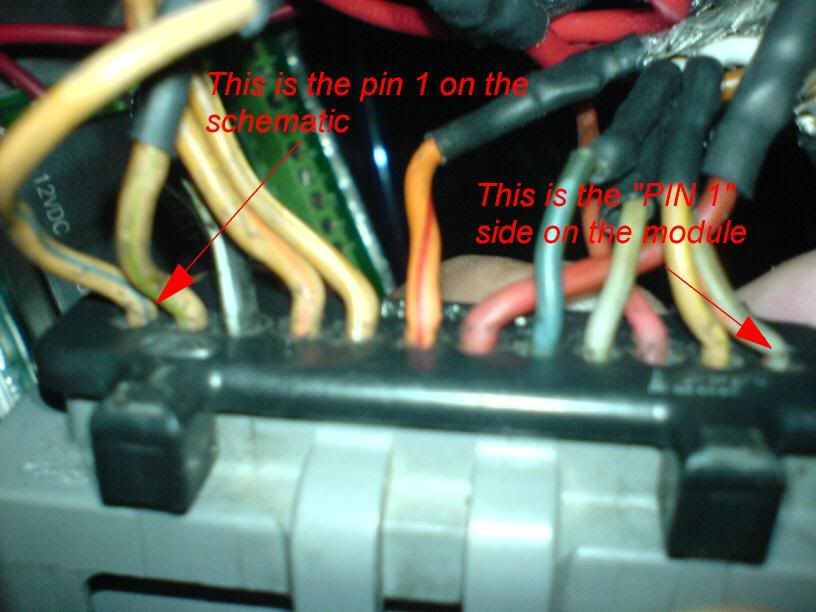
Once again, using the retaining clip as reference to the schematic and connector, this would mean Qzmo's picture
has the PIN 1 at the bottom how he is holding it. I would suggest ignoring wire colors as my PIP is beige/yellow and my PIN 12/coil D is grey/blue, although the power and ground are the expected red and black/grn and VR/PIP/SAW shielding is pink/red.
I would use the module's PIN1 and the retaining clip as a locating reference and show a module-view pinout for verification and possibly avoid some confusion. Perhaps I can get a better pic and try labeling it for the site.
David
PS - Qzmo, I could send you my spare EDIS8 at cost to get you going - PM me if you need it.